
|work| — Cccam Kanasa Install
stop() echo "Stopping CCCam..." killall cccam
cat > /etc/cccam.cfg << 'EOF' # Example CCCam configuration SERVER=123.45.67.89 PORT=12000 USER=yourusername PASS=yourpassword # Optional: limit the number of concurrent users # MAX_USERS=5 EOF Add CCCam to the init system so it launches on boot. cccam kanasa install
CCCam (Card Sharing) is a protocol that allows multiple satellite receivers to share a single subscription card. Kanasa is a popular Android‑based satellite receiver firmware that supports a wide range of hardware (e.g., Dreambox, Vu+, Octagon). Installing CCCam on Kanasa lets you connect to a remote card‑sharing server and decrypt encrypted channels. Prerequisites | Item | Minimum Requirement | |------|----------------------| | Hardware | Android‑based satellite receiver running Kanasa (e.g., Dreambox DM‑7020, Vu+ Solo2) | | Storage | ≥ 100 MB free for the CCCam binary and config files | | Network | Stable internet connection (wired Ethernet recommended) | | Access | Root or sudo privileges on the Kanasa system (usually via SSH or telnet) | | CCCam Server Info | Host IP, port, username, password, and optional “user‑limit” settings | Installation Steps 1. Access the Receiver ssh root@<receiver_ip> # or use telnet if SSH is not enabled telnet <receiver_ip> Default credentials are often root/root or root/1234 ; change them immediately after login. 2. Install Required Packages Kanasa is based on Android, so you use apt ‑like package managers provided by the firmware (e.g., opkg ). stop() echo "Stopping CCCam
cd /usr/bin wget https://raw.githubusercontent.com/CCCam/CCCam/master/cccam-armv7 -O cccam chmod +x cccam Create /etc/cccam.cfg (or /home/root/cccam.cfg depending on the firmware layout). Installing CCCam on Kanasa lets you connect to
opkg update opkg install wget ca-certificates Choose the binary that matches the CPU architecture (most Kanasa boxes are ARMv7 ).
| Aspect | Disadvantages | |--------|----------------| | | Susceptible to eavesdropping | | Reliance on External Server | Service quality depends on server uptime and bandwidth | | Potential Legal Risks | Card sharing may be illegal in many jurisdictions | | Manual Maintenance | No graphical installer; requires command‑line work | Bottom line: Installing CCCam on a Kanasa‑based receiver is straightforward once you have root access and the correct binary. Follow the steps above, keep the configuration secure, and stay aware of the legal environment in your country.
cat > /etc/init.d/cccam << 'EOF' #!/bin/sh /etc/rc.common START=99 STOP=10 start() echo "Starting CCCam..." /usr/bin/cccam -c /etc/cccam.cfg &


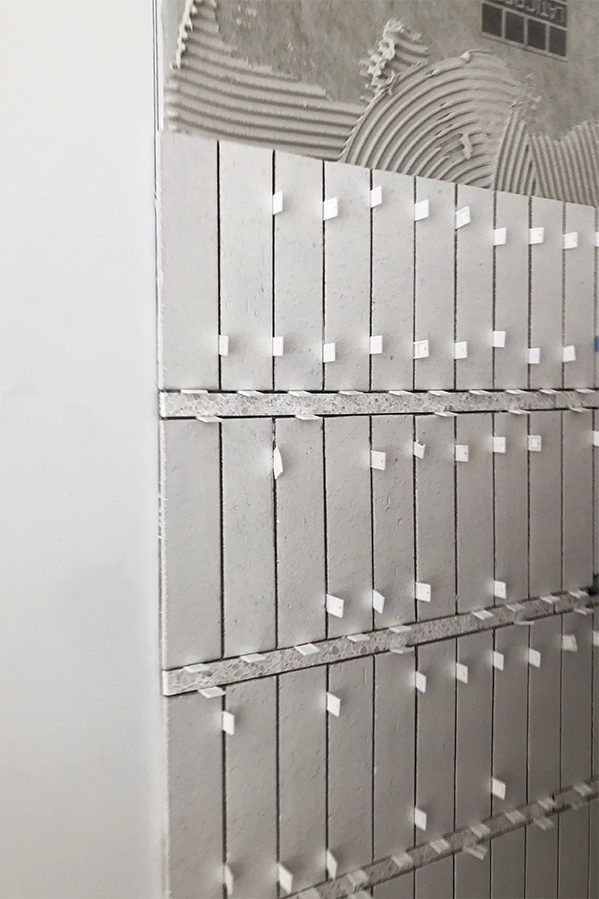
Never will there be a fancier temporary spacer than terrazzo- ha! It looks absolutely stunning.
haha right?!
I had been wondering how that thick grout line would hold up as most sanded grouts say max 1/2”! Thank you for sharing! It’s beautiful!!
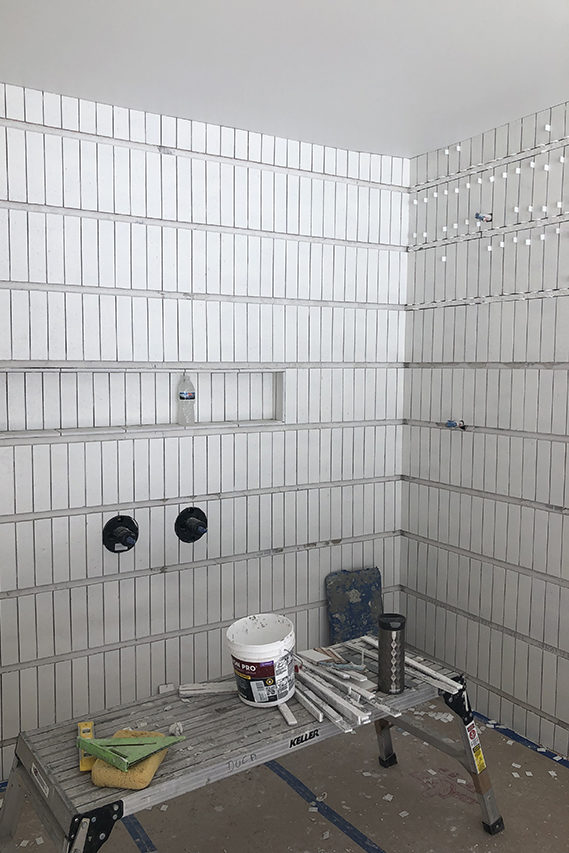
Love it. I want to see your vanity! Also, are your terrazzo floors matte or glossy finish? X
I second this!! I actually came on here hoping we’d get a little morsel on the custom concrete vanity/sink. But perhaps she’s been giving it time just like this tile install before sharing.
Thank you for sharing! It turned out fabulous and I appreciate you wanting to make sure it held up well.
Hi sarah,
That tile is so beautiful! I want to do something similar in my shower but worried the thick grout will start to show cracks after awhile. Did you seal the grout in yours?
What mirror is that? I have been looking for a similar mirror? Is the mirror backlit?
Did you have to fill in the 1″ area of grout enough to cover the top and bottom of the tiles?
[…] matte white on the walls and the Natural Zellige on the floor. Read all about how we executed the wall tile treatment here. I designed the custom concrete vanity with an integrated sink and had it fabricated […]
I am curious if you could give any insight into how the application of the grout was done. How did you keep the one inch grout line looking smooth while also making sure to remove any grit haze from the tile? I would be afraid that as I wipe the grout off the tile face that I would mess up the finish of the thick grout line. I really want to try this but it makes me nervous!
Did you use a schluter tile edge strip where the tile transi to REGULAR wall?
Hi Gina!
No, Cle offered glazed trim tile so it looks like an edge so no need for a schluter.